How To Grow Plants From Seed – 10 Tips
How To Grow Plants From Seed – 10 Tips
It’s the time of year when just looking at the racks of seed packets can cheer us up. But beyond being a mid-winter mood lifter, shopping for seeds in February makes good sense. First of all, now is the time to start peppers from seed if you want to grow your own bell or hot pepper plants. Secondly, getting your seeds early helps in planning your garden for the growing season to come. And finally, knowing that you have the seeds for specific varieties that you want to grow is reassuring.
Here are 10 tips for success when you want to grow plants from seed.
- The back of a seed packet is your best friend. In a small amount of space you will see instructions about when to plant the seeds, and if they are best started indoors or directly into the ground outside. You will see information about how long the seeds typically take to germinate, whether they need to be covered or exposed to the light, and how much light the plants will need once they are in the garden.

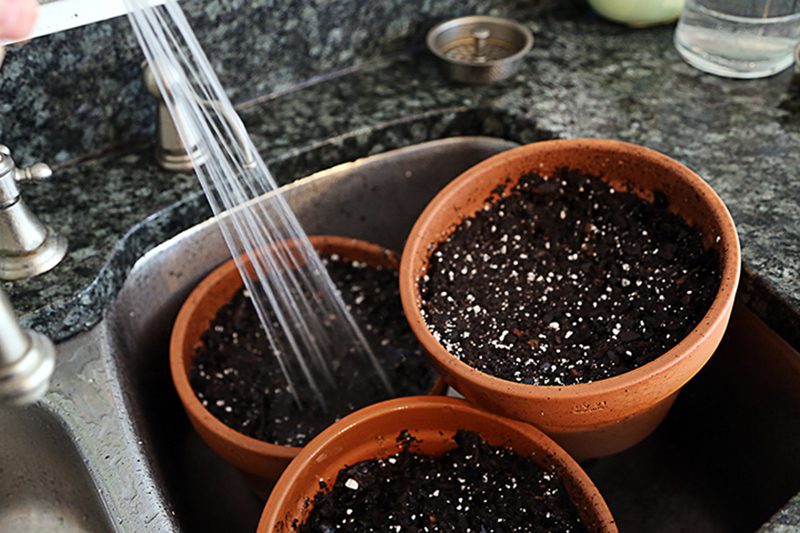
2. If you’re starting seeds indoors, use a good quality potting soil or seed-starting mix. Do not use garden soil because it has weed seeds and assorted fungi that may not be your friend. (There are a few fungi that cause what is known as “damping off,” a condition that causes new seedlings to rot at soil level, fall over and die. This is more likely to happen if you’ve used garden soil or re-cycled potting soils.)

3. Get your potting mix damp before you plant the seeds. You can either do this by putting a good amount in a large bowl or tub and adding water, mixing with your hands, or by filling your pots or flats and watering well with a hard spray. If a peat-based potting mix is very dry, the water tends to run off the top…mixing with your hands or a trowel will help break the surface tension and allow the mix to absorb the water.
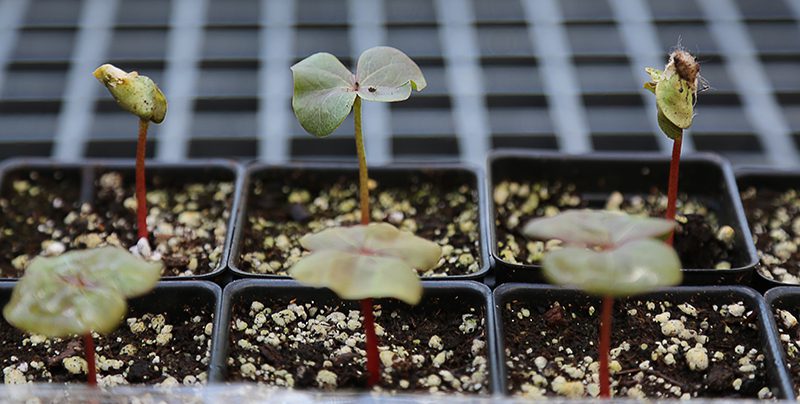
4. Your seed packet will tell you how much to cover the seeds, or if they need light to germinate. In general, however, the larger a seed is, the more soil will cover it. Very fine seeds are often pressed into the top of the moistened potting mix.

5. Whether you’re starting seeds indoors or directly outside, be sure that they remain moist while germinating and after they sprout. Indoor pots can be covered with clear plastic to help hold in the moisture while the seeds germinate – check the pots daily to see if they have sprouted, and remove plastic promptly if they have.

6. Indoors, germination is helped by using a heat-mat. These keep your pots or flats at the right warmth for sprouting. Once seeds have spouted, you can move them off the mat and use it for another set of seeds.

7. When starting seeds indoors, it’s best to use one seed per pot or cell. Plants will grow larger when they aren’t growing with others in the same container, and they will suffer less damage when transplanting if you don’t pull them apart and break roots.
8. If sowing seeds outdoors, check the area daily and water if the soil is getting dry. As soon as the seeds germinate, you might want to dust the seedlings with DE (diatomaceous earth) to prevent the earwigs and slugs from eating them.
9. Start perennial seeds indoors. Most perennials take a bit longer to germinate and grow, so plant them in late-February or in March, and grow under lights until you can put the plants outdoors in May.

10. Don’t start vines indoors. Vines grow quickly and unless they are separated by a couple of feet, they’ll get tangled together. Take it from one who has made this mistake in the past! If you want to get an annual vine off to an early start, plant the seeds in late-April so that by the time they get to be five inches tall, you can immediately plant them outdoors.

C.L. Fornari is giving a Success With Seeds virtual seminar on February 27, 2022. Register here.
Subscribe To Our Newsletter
Sign up for our weekly email about sales and events.